Case Study November 4th-13th 2024
Michael Russell UX Design
A key aspect to any society is commerce and trade. The Digital City which serves around 200,000 people in the northern regions of South Africa (Southern African Setswana diaspora) wanted to be able to showcase the ingenuity and business acumen so their people can support each other’s businesses. This case study will cover:
- Regular users shopping online.
- Business owners creating shops to sell items.
- Administrative duty such as vetting shops and products.
Standard User Flow
The chief goal for any successful shopping site is the simplicity for users to find items they are interested in purchasing, while also algorithmically categorize items that they may be interested in purchasing in the future, based off their personal trends. Algorithmically is more on the coding side but we can design contingencies for that.
The standard users (shoppers) are likely to do most shopping on their phones since desktop and laptop computers are scarce in these communities, so we focused mainly on a mobile flow that is designed with familiarity to other shopping sites such as Shopify and Amazon.
Homepage

- Homepage contains a welcome message for the user.
- User can quickly access their cart or past purchases at the top of the page.
- User has access to a search bar at the top to find anything they need.
- Featured shops included that the user has visited before.
- This particular user likes to shop for:
- Skincare
- Kitchen Goods
- Clothing
- The Bottom Navigation can:
- Take the user back to the home page.
- Go directly to their cart.
- View previous purchases.
- Search through “Discover.”
- Side Scroll available to go directly to certain items.
How to make a purchase
In this instance the user would like to purchase a clay pot from a local business.
- Go to “Shop Kitchen Goods” or “Search”
- Select “Clay Cooking Pot.”
- Select “Purchase” on the product screen.
- Confirm EFT information and whether it is for Pick-up Or Delivery.
- Quick links to cart and purchases remain.
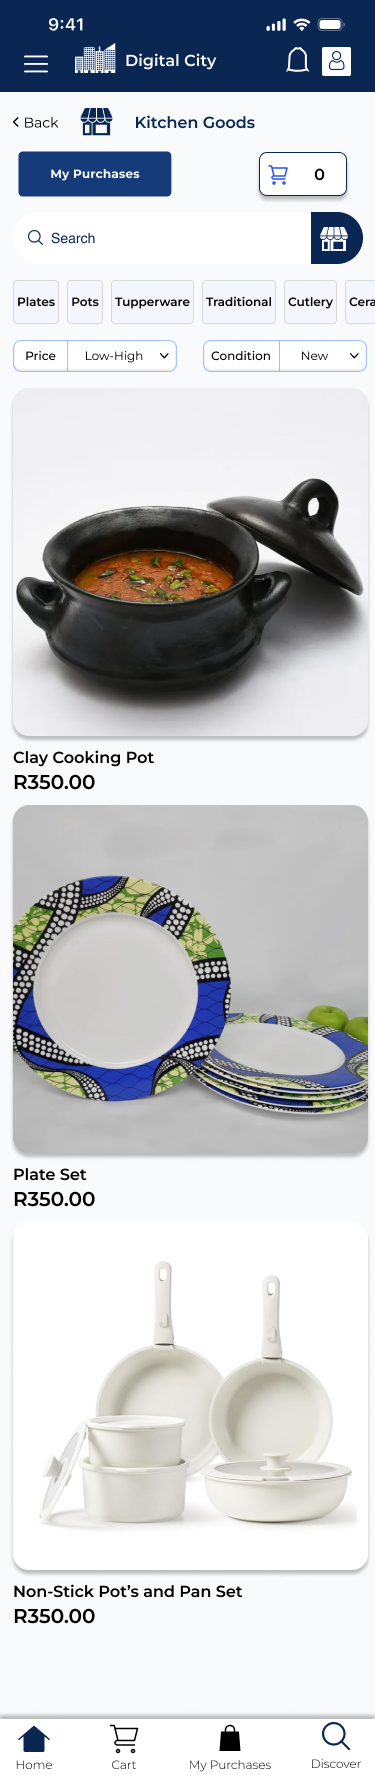
- In “Kitchen Goods” the user is offered some of the most popular ordered items.
- The user can toggle through keywords at the top or type in exactly what they are looking for in the search bar.
- The user can toggle the price type and condition of the products.
- User can access the product just by tapping the picture.
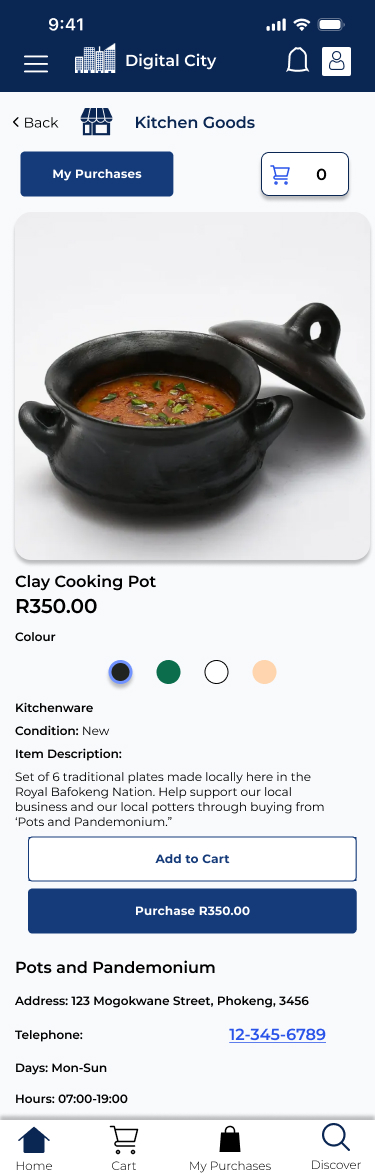
1- User selects item can purchase immediately or add to cart.

2- item Added to Cart.

3- If deciding to purchase user fills out form for EFT (until the “Digital Wallet” is completed and approved with financial institutions)
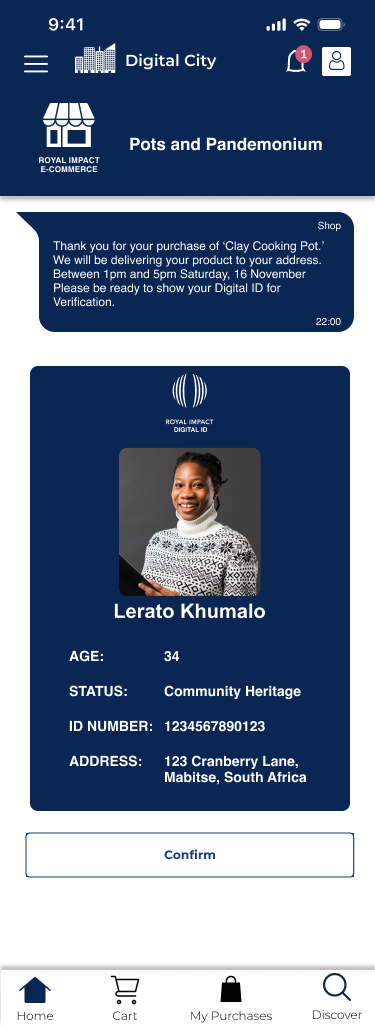
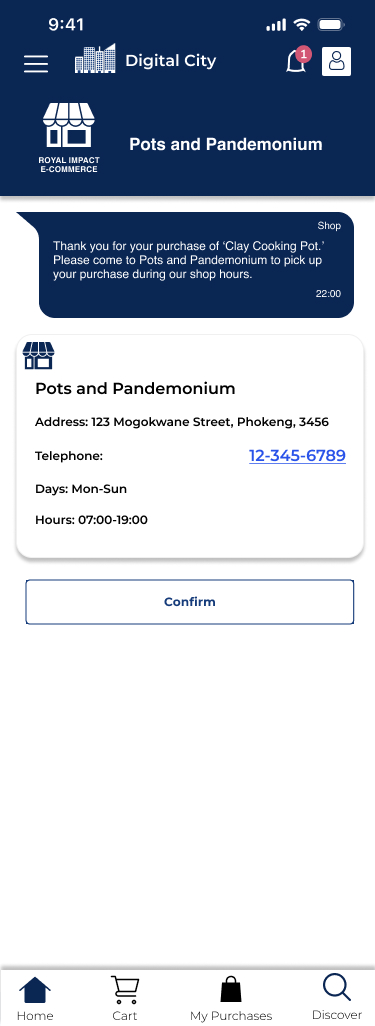
The User receives a notification based on what they have selected (Pick-up or Delivery) on the day that it is ready.
- Screen 1 is for a delivery
- Screen 2 notifies of pick-up.
Visiting a Featured Shop
Since a large reason for this platform existing is to promote local community businesses it is important for local businesses to be featured in a prominent manner.
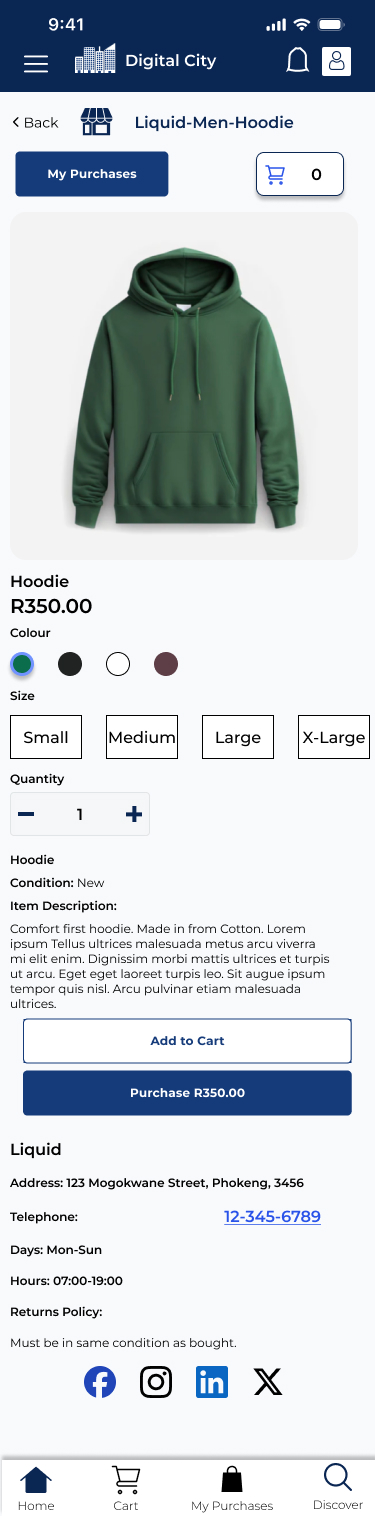
Users can fin featured shops on the home screen or through the search function and finding shops. In this instance the user visits a (made-up) local business called ‘Liquid’ which is an athletic wear shop. Accessed through the Home Screen.
- User Finds Shop.
- User goes to Menswear.
- User Selects Hoodie.
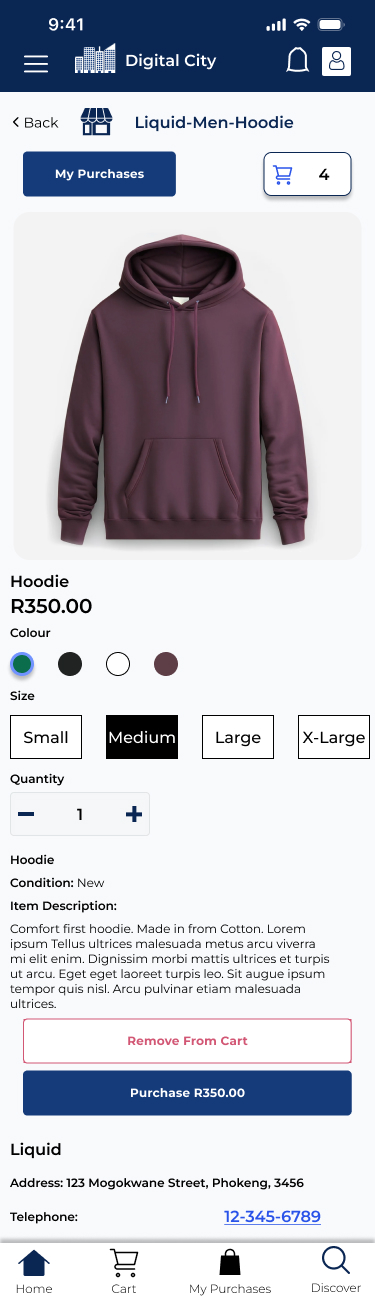
- User wants a different color.
- User Selects Size.
- User Views Cart.


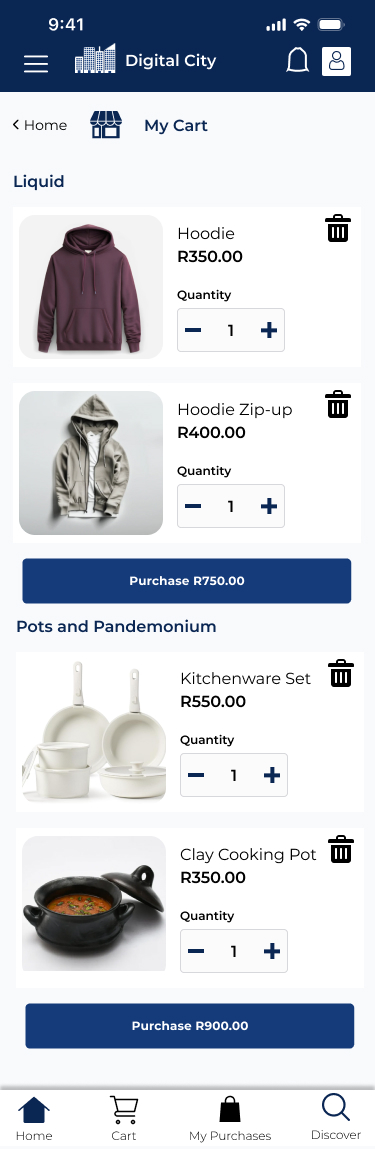
So it is pretty simple and standard when set against other online shopping experiences. The main difference comes to the cart (3rd image above) where they have to buy directly from the business and cannot bundle it together like on Amazon, especially because it is up to the business themselves to see if that is fully available for delivery or whether the customer has to pick it up.
Business Owners
The first step for business owner’s is to create their online shop:

They must fill out the required fields as well as adding in when the shop is open and whether delivery is available. They are also given the options to add customizations to how their shop will look online to other shoppers (but very minimalistic at this point) and the ability to upload logos and Social Media links.
After creating the shop the user must submit it for approval with the Digital City’s Administration to make sure that the shop is not selling contraband of any kind (all products also must be vetted).
They are then guided to adding products because otherwise its just a digital storefront.

When listing a product the shop owner must add:
- Product Name.
- Category (clothing eg. Mens, Womens, etc).
- Collection (Tops, Trousers, Shorts, Shoes, etc).
- Sizes.
- Condition (some shops may be reused).
- Description.
- Colour.
- Inventory – eg. sizes and how many of each size.
- Any Variations (eg. Different Colors)
- Same process as inventory.
- Add Photos so users can see what they are buying.
This also is sent for approval by the admins.
Dashboard
Once the user has created the shop they will land on their dashboard.
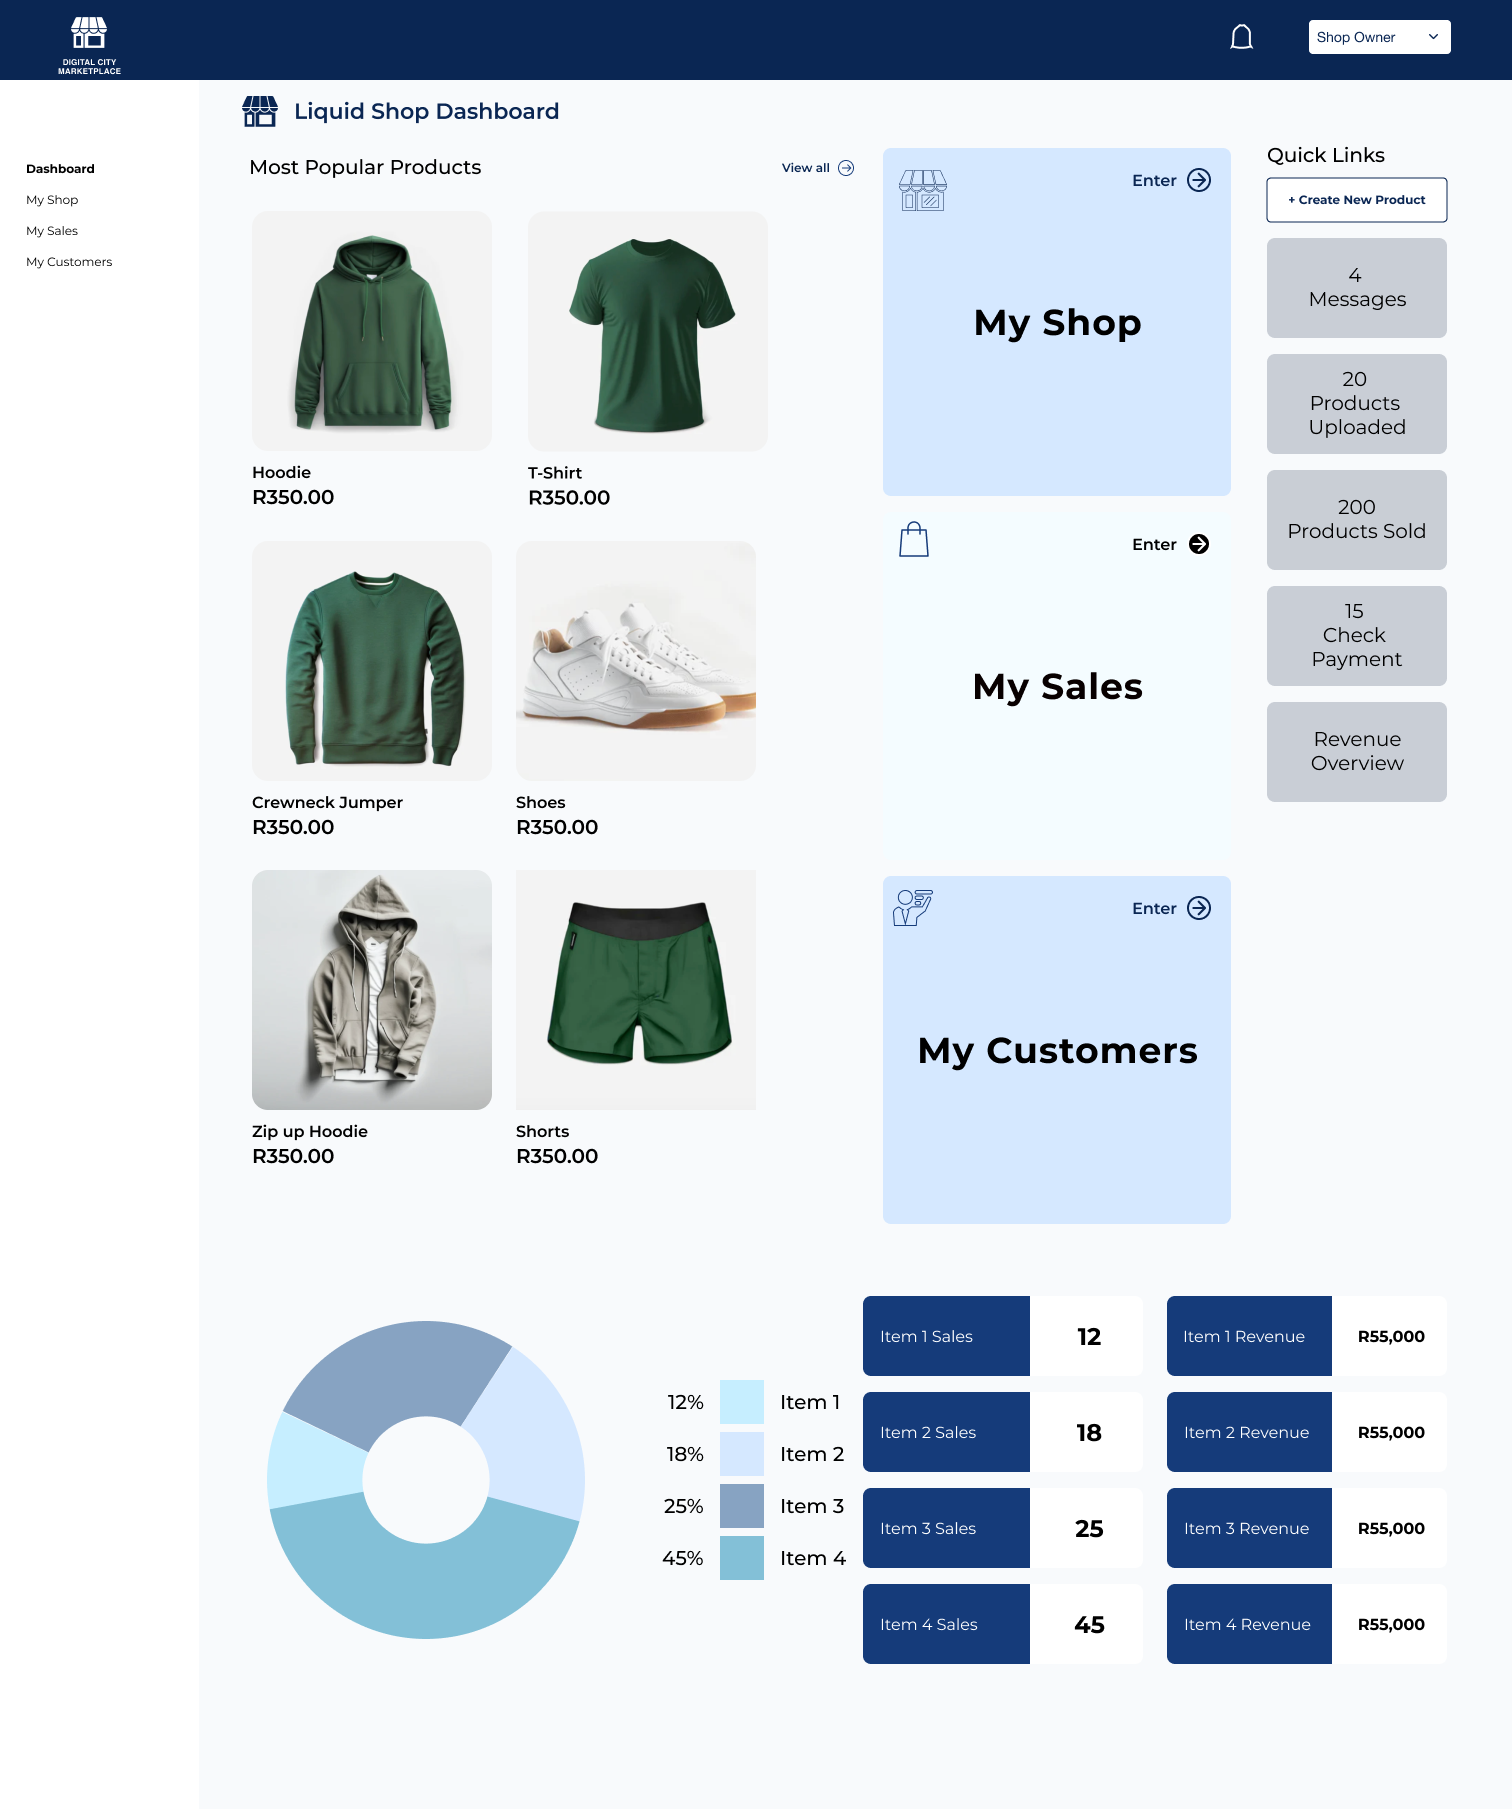
This is the dashboard once everything has been uploaded and the shop is up and running smoothly.
Similar to the Digital Library this Dashboard showcases the most popular items of the shop. Quick links to go to my shop and view items and edit items. Quick link to see sales and customers for any delivery or payment issues. As well as graphs for revenue.
My Shop

In My Shop the shop owner can edit anything and go through their collections. All products are added to collections (if the shop has several collections) and the shop owner can use that as a portal to look at individual products too.
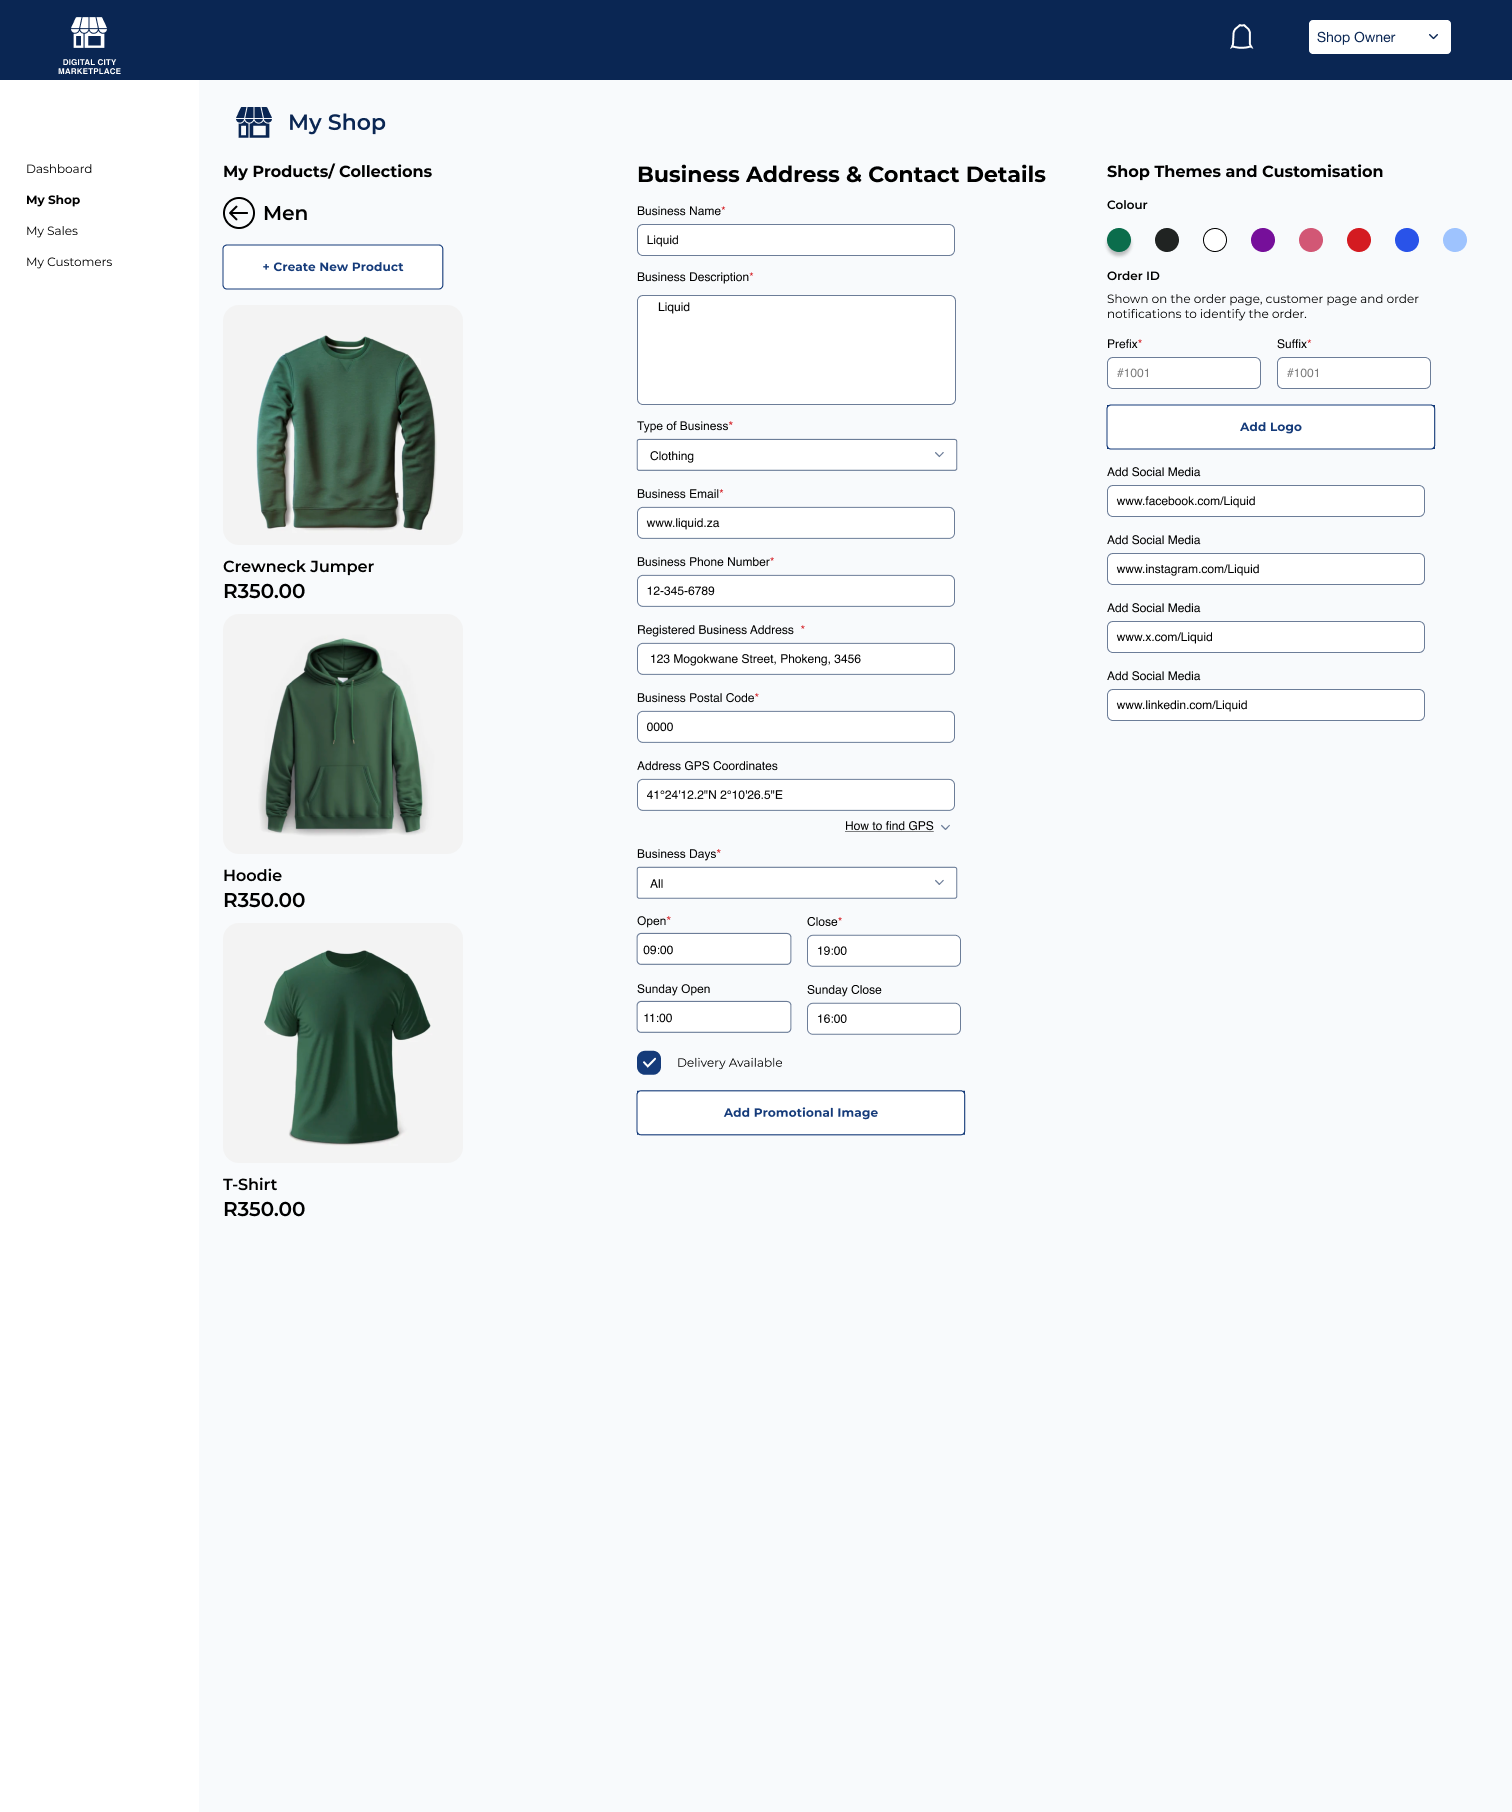
Here the user has selected mens and it brings up the men’s collection. They can click on any of the items to bring up a Teh product view.
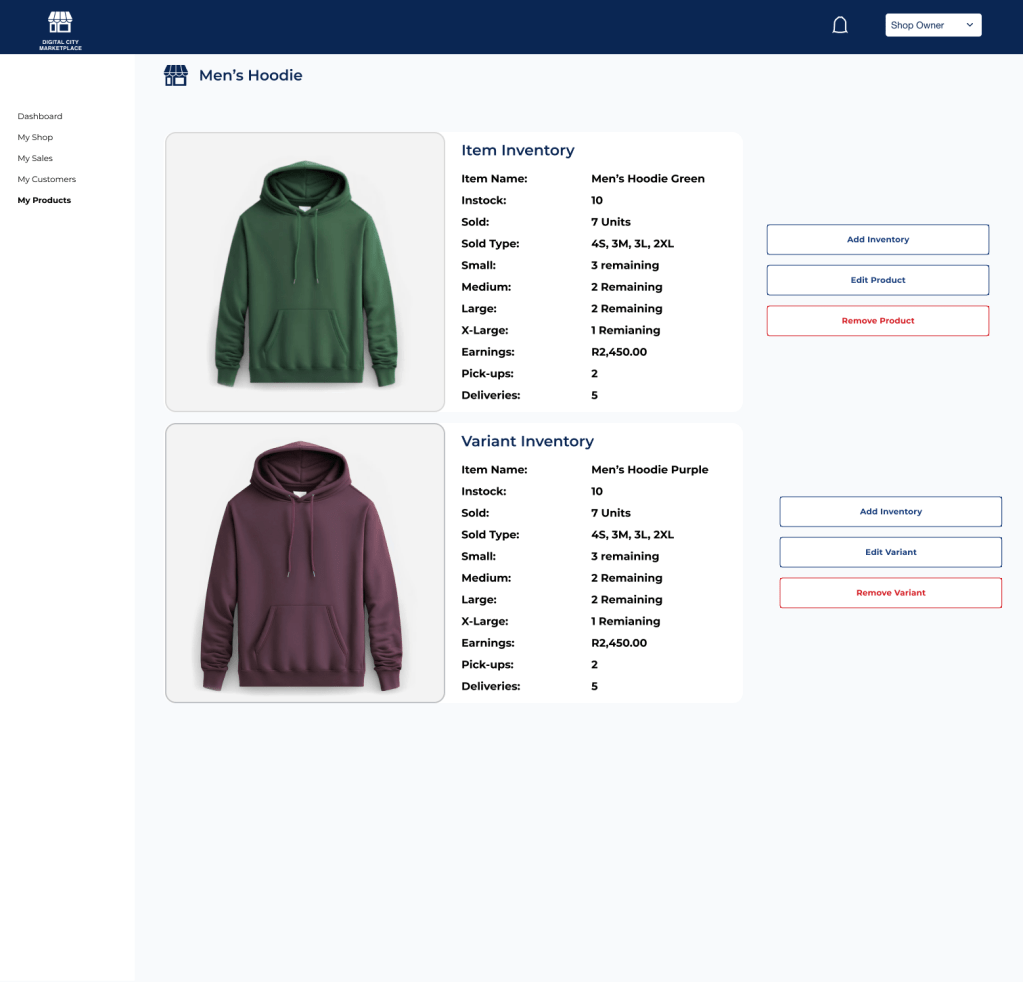
This will show the product and all its variants and information such as how many are left in stock, how many have sold, the remaining stock per size, and the total earnings of each. The user can edit the product add extra inventory or remove the product entirely if it is forever sold out. Note that any edits of the product must go through the approval process again.
My Sales
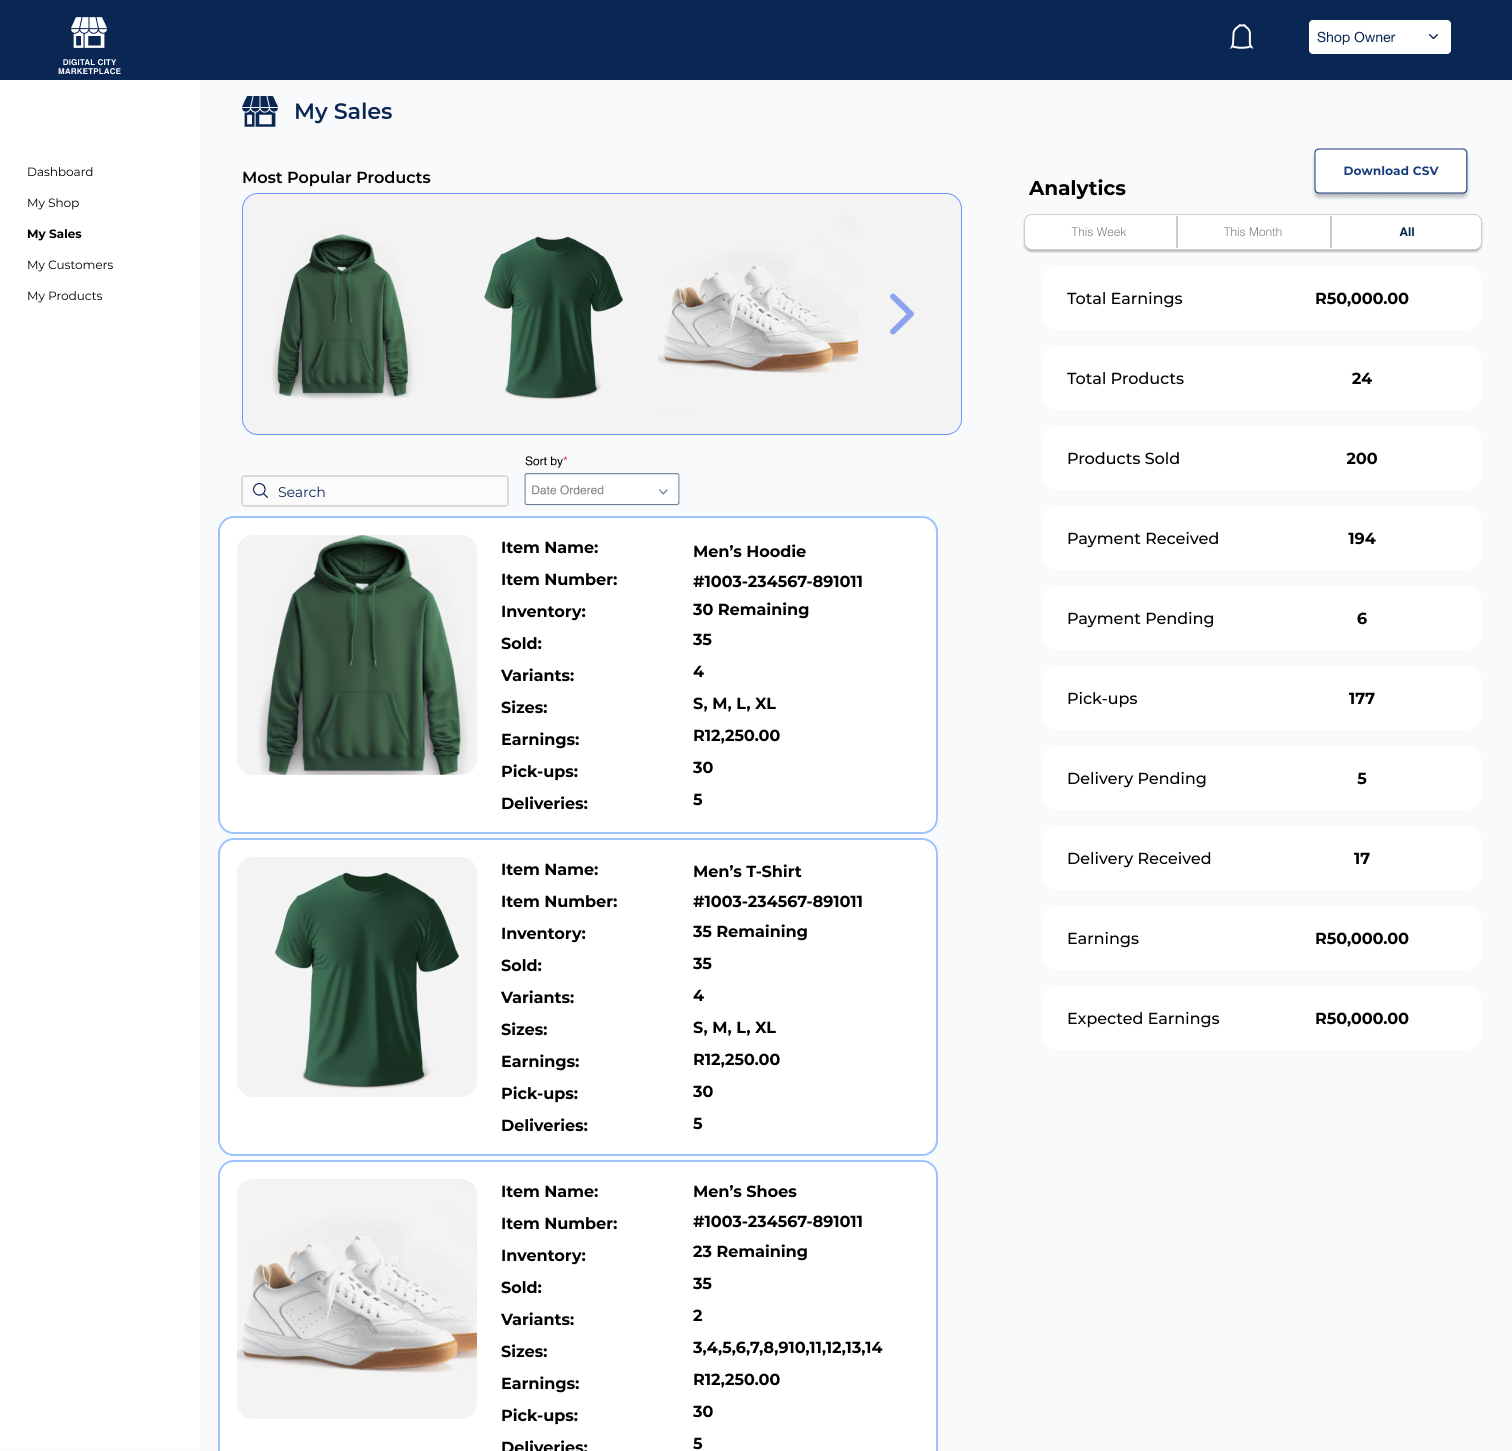
My Sales provides analytics and descriptions for each product and overall earnings. The owner can see the earnings per week, the most popular products and the most recent orders too. They can also search particular items to see how they are selling and download a CSV of their earnings to provide stronger understanding of how well their products are selling on the site.
My Products
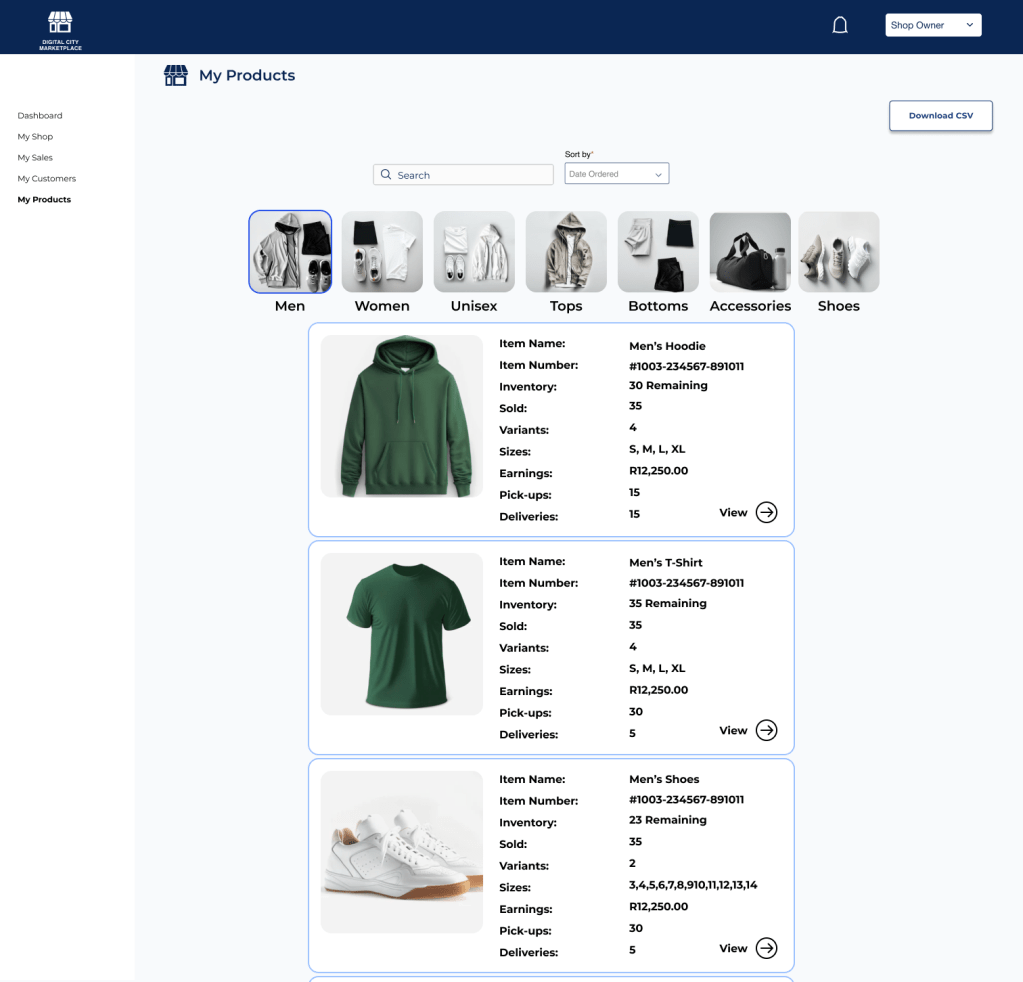
Another quick way for the user to go and toggle through their products that they are selling. Sort by Date ordered, uploaded, sales. The user is also able to browse through collections (‘Men’ is highlighted here).
My Customers
Shop Owners can access their customer base through the dashboard and see the most recent purchases.
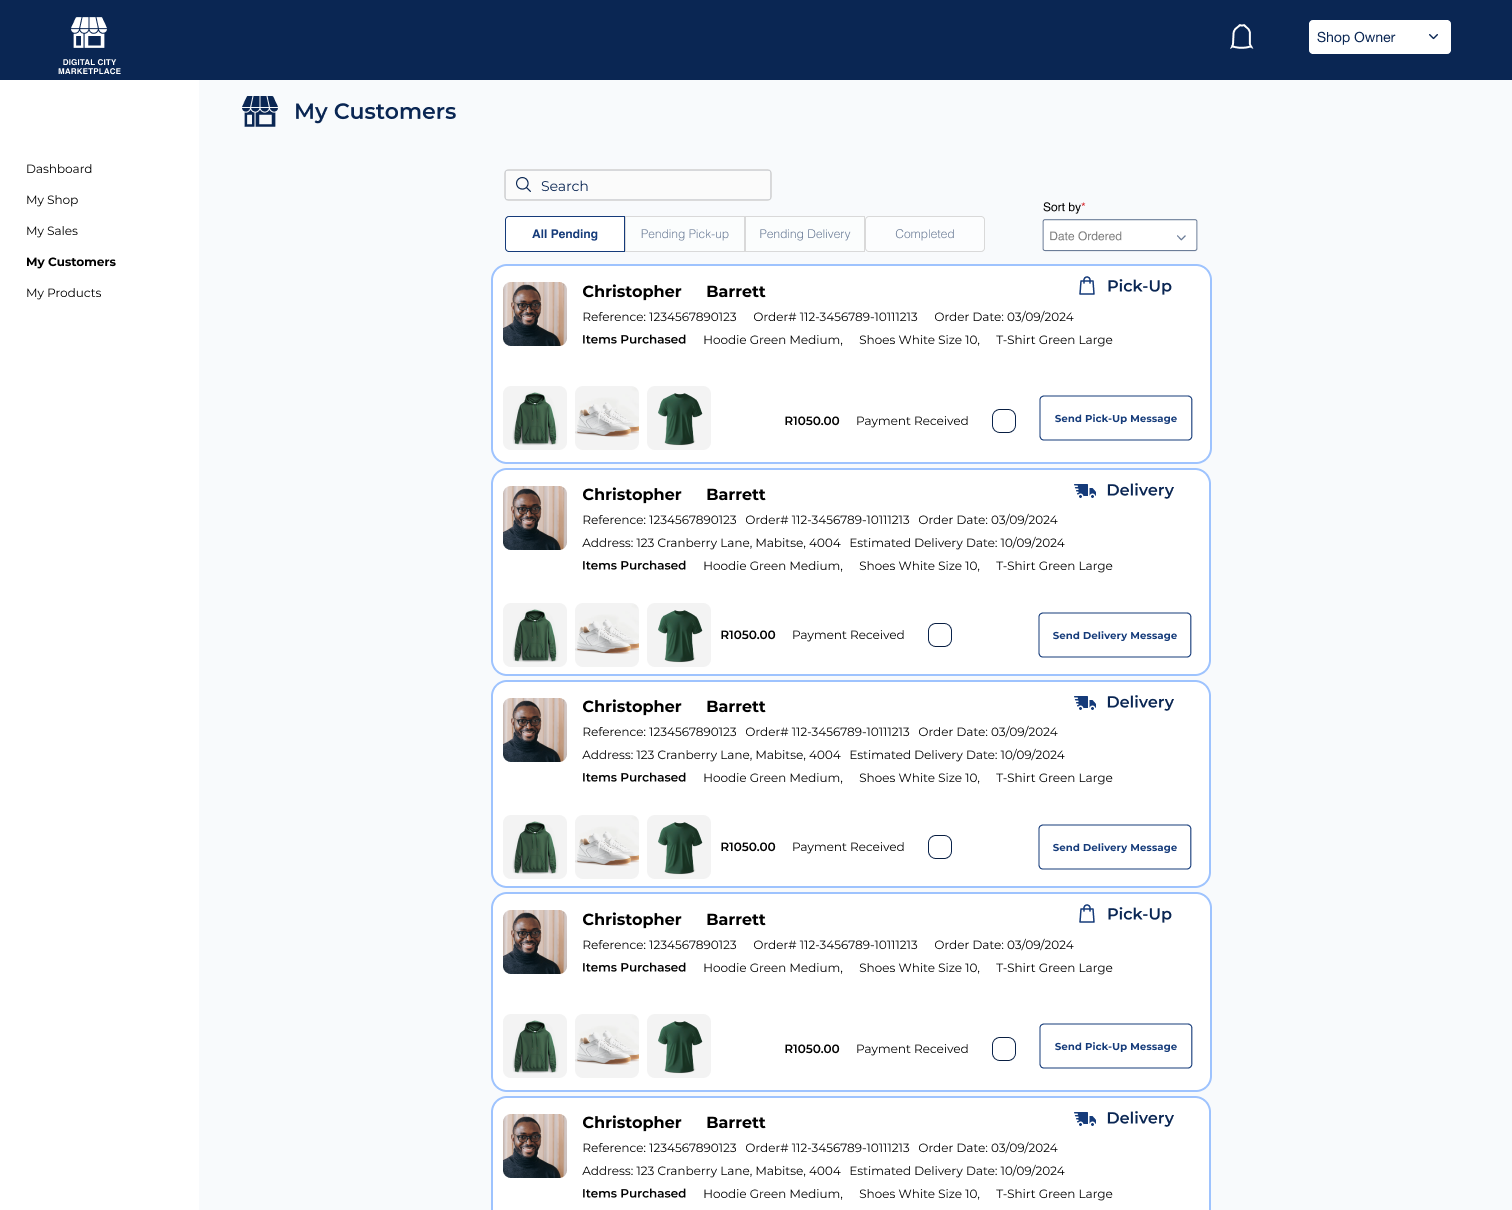
The shop owners are always notified whenever someone buys a product from their shop and until the “Digital Wallet” is complete they must sort it out with the customer’s themselves. In this case it is showing all the pending orders (these are pending a payment) and the shop owner can toggle at the top to find what has been ordered for pick up and delivery even though it is included in the sales bubble containing all the information with iconography and the method of retrieval. Once everything is approved the user selects payment received and sends either a pick-up or delivery message to the customer notifying them when the delivery may be due, or when to pick up their merchandise.
Admin Approvals
The last piece of the marketplace puzzle is how the Digital City Administrators function in all of this. They must approve all shops and all products listed. The goal of all this was to make it as quick as possible for the Admin’s to approve or deny a shop or product. The approval must go through 2 administrators.
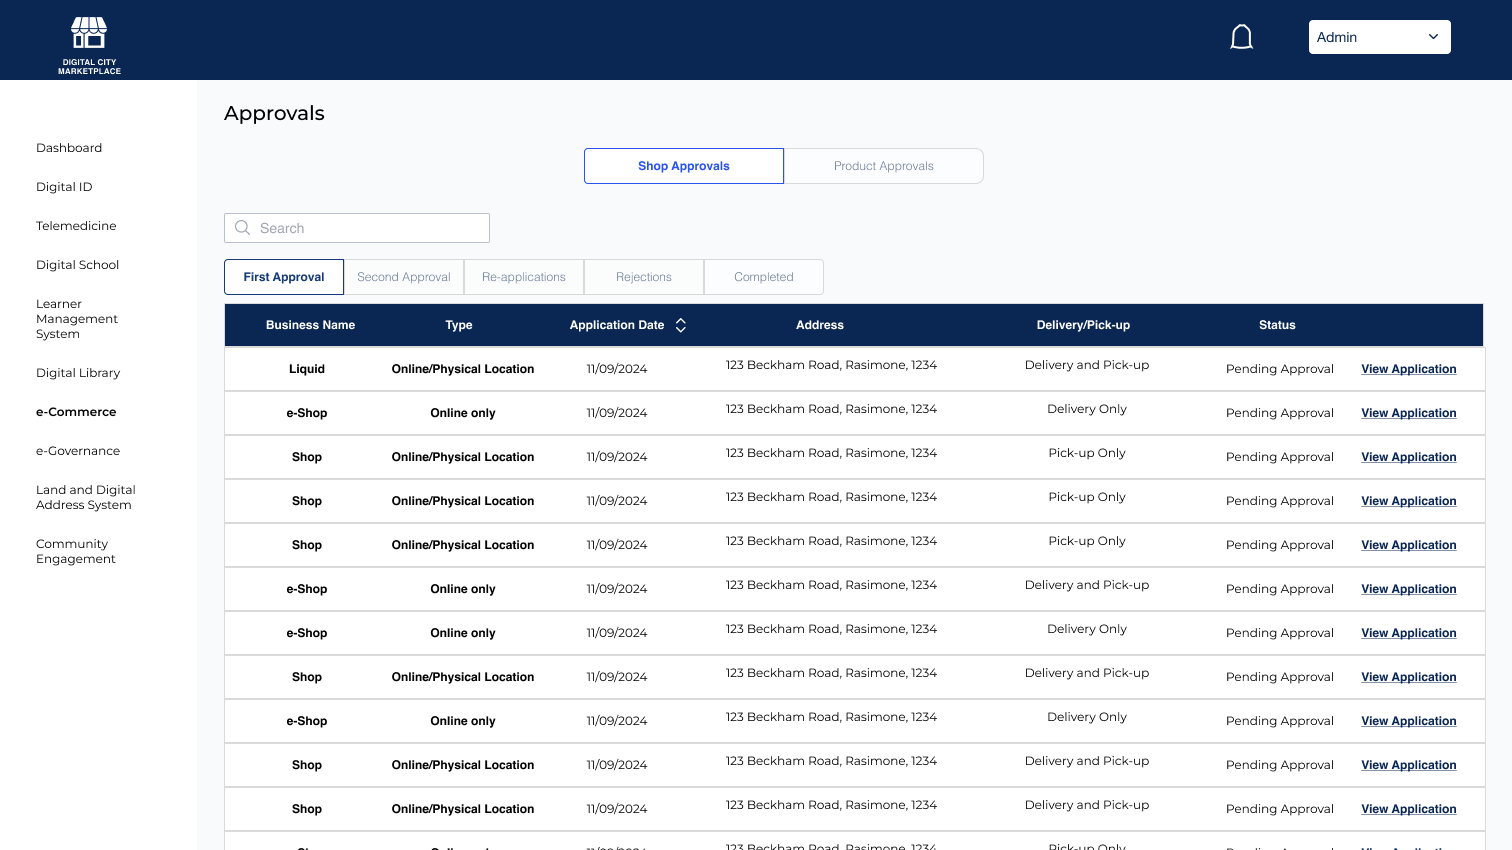
The Approvals section has a few different ways of finding what the administrator needs to do. This screen represents the first approval process (no other admins have touched them yet). The bar at the top allows the administrator to see what needs a second approval, any re-applications, a list of rejected shops and ‘completed’ (Approved) shops. It also shows application information, shops addresses, whether it is a physical location and online or purely an online shop and whether it is delivery, pick-up or both.

The Admin reviews all of the information sent by the owner and makes a decision to approve, message, or reject. (Message is to get more information if anything is missing)
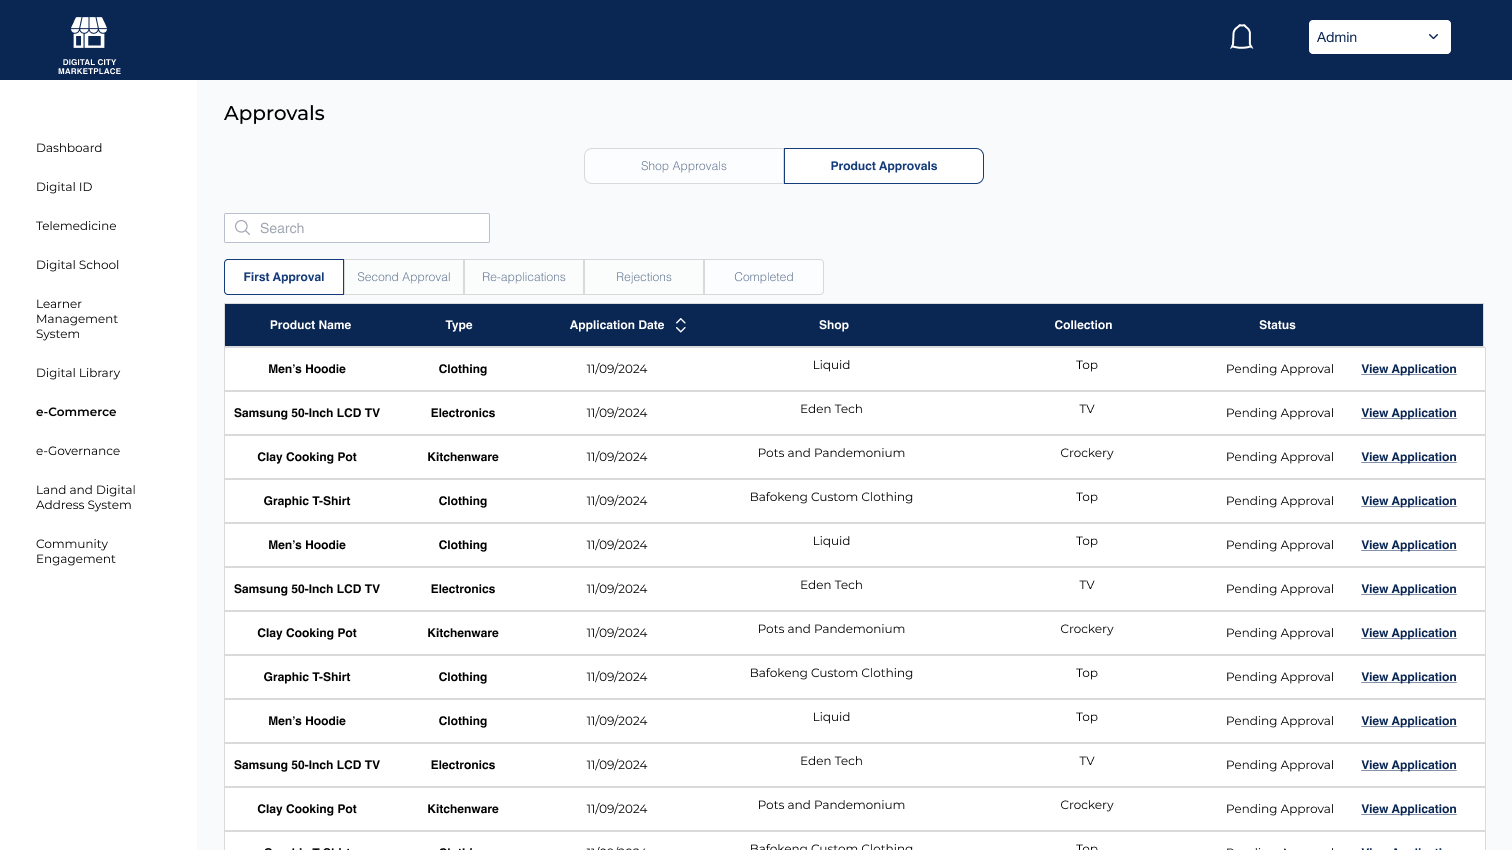
Product Approvals are pretty much the same process. The only difference is the values in the table, such as the type of product, the shop, and which collection it belongs to.
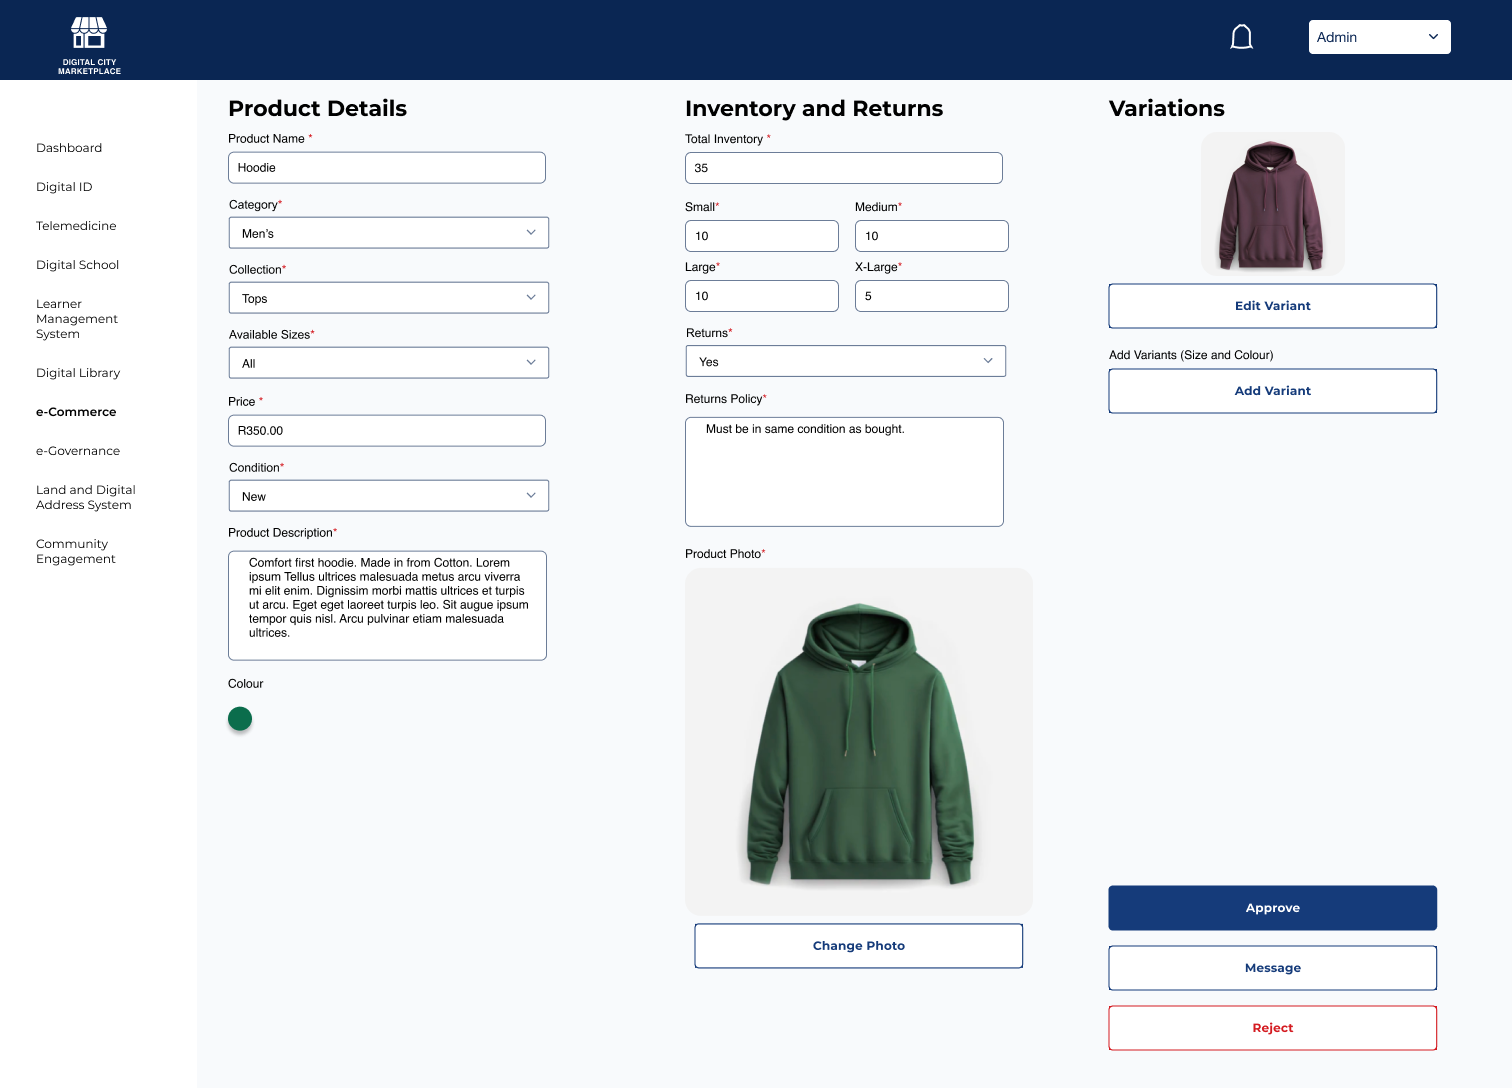
The admin can view what the product looks like and the approval works in the same way as for shops.
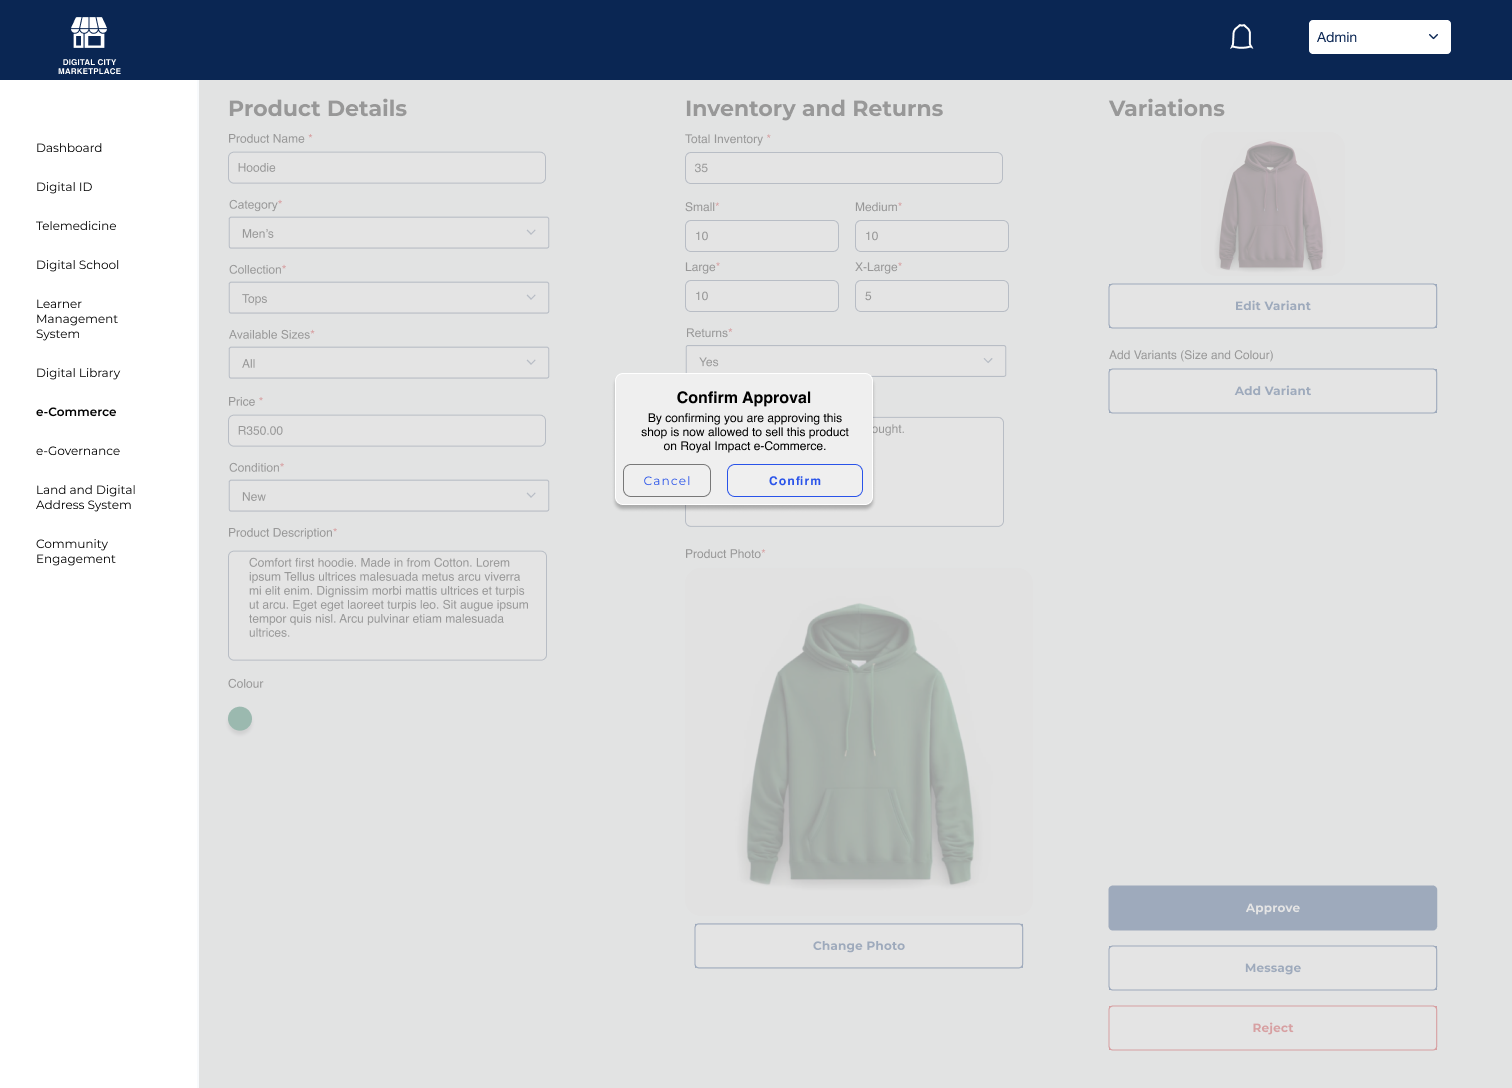
The Admin Confirms the approval and then either waits for a secondary approval, or if they are the secondary approval that product is now available to be purchased.
Viewing Active Businesses (Admin)
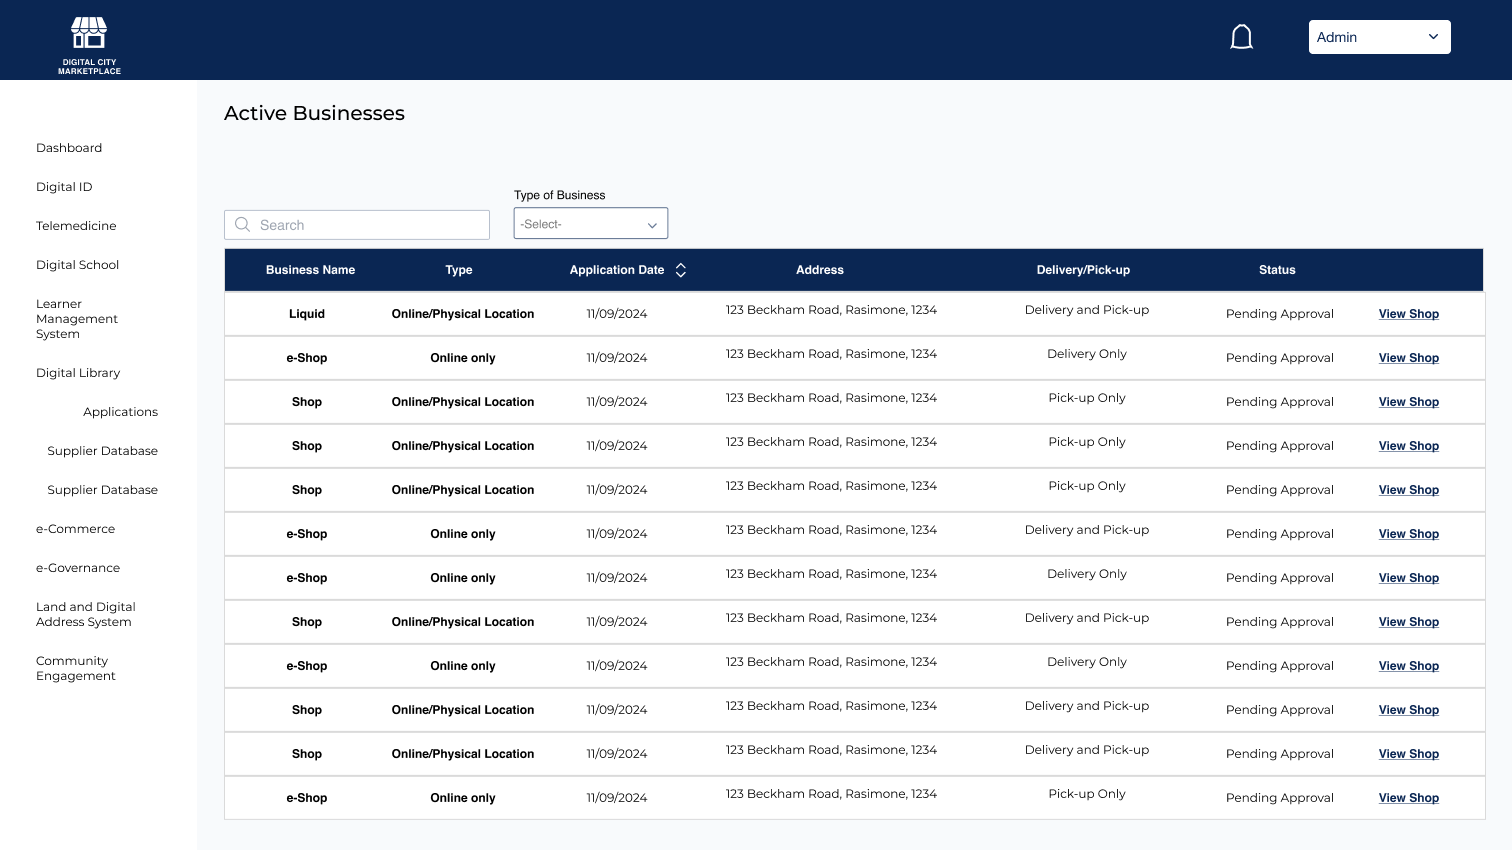
Toggle through shops selects ‘view shop’.

Views shop and selects Men.
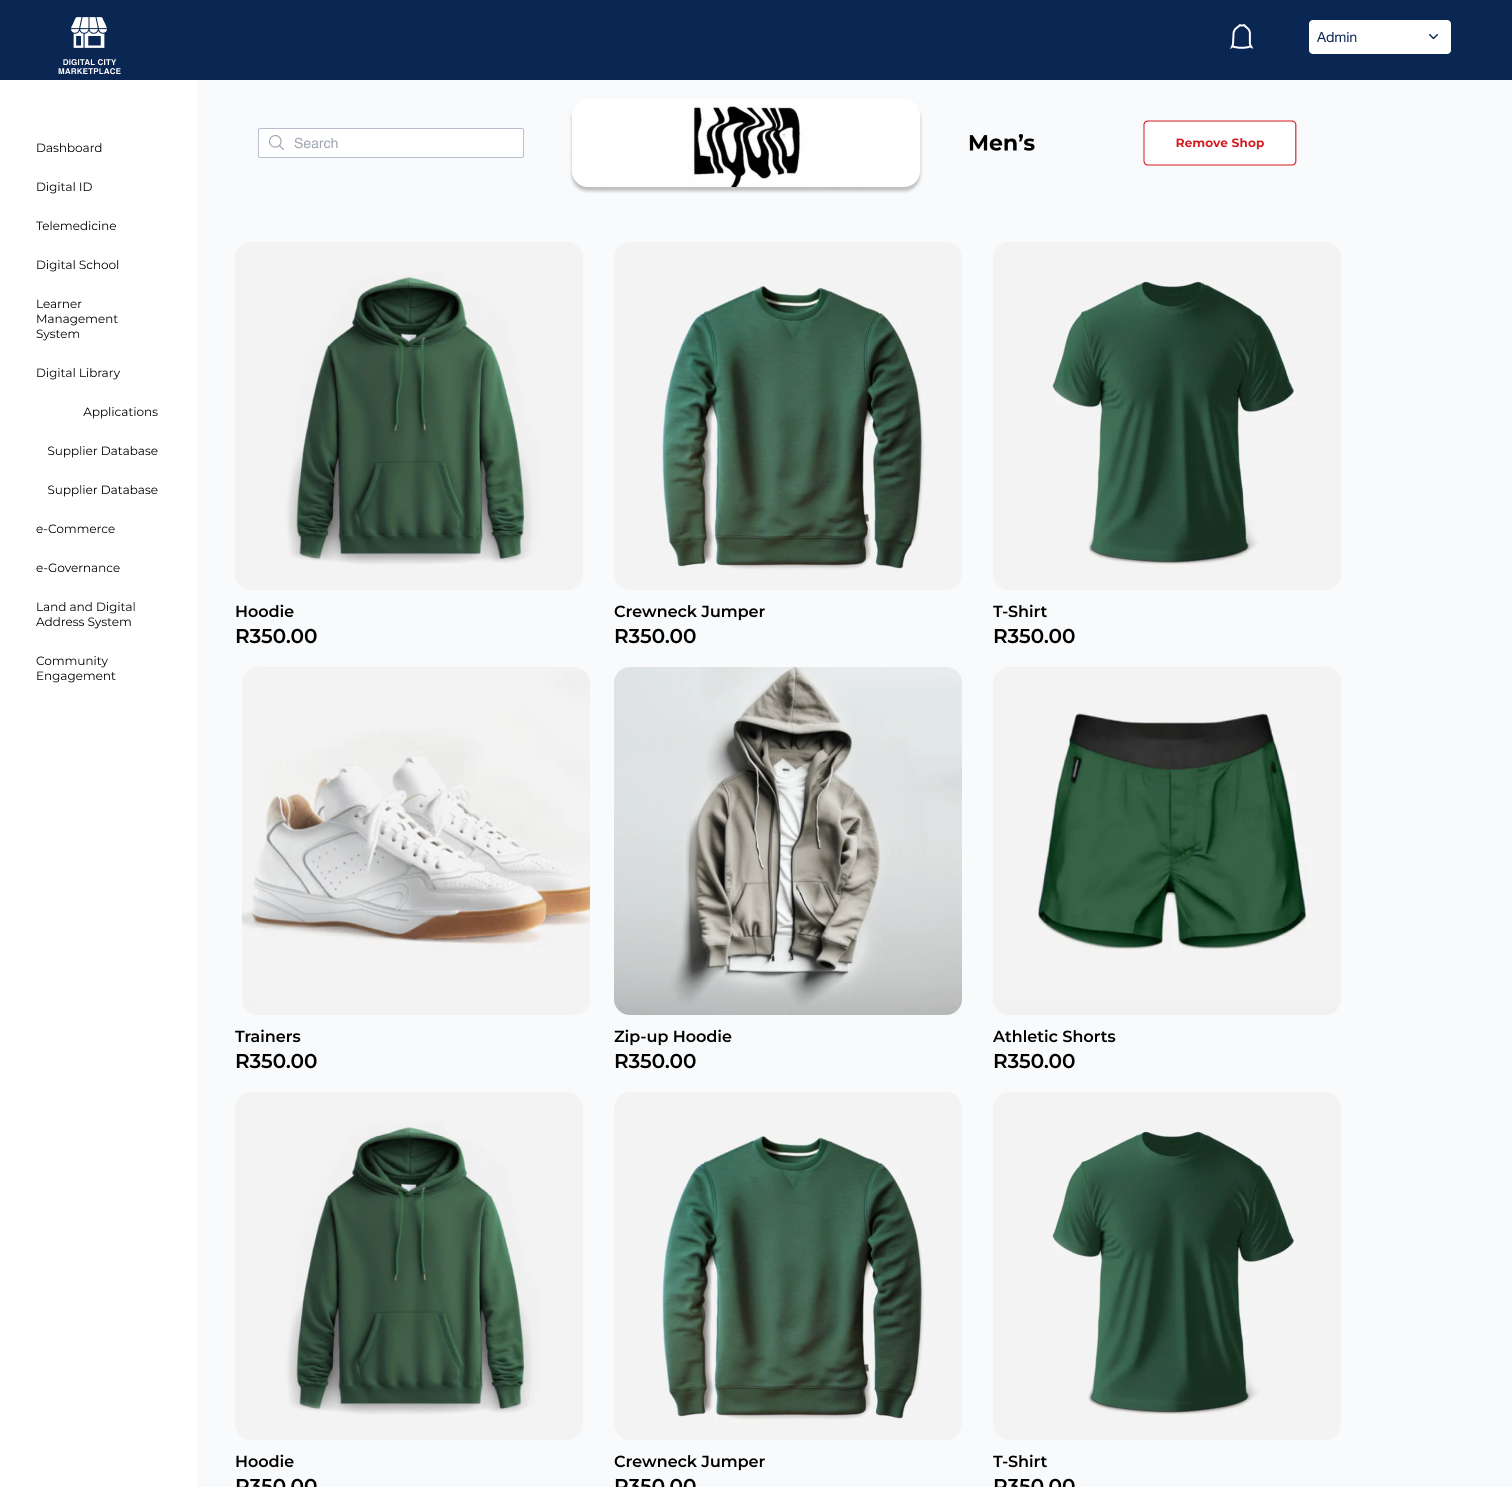
Selects the item that may have caused issue. (Hoodie in this case)
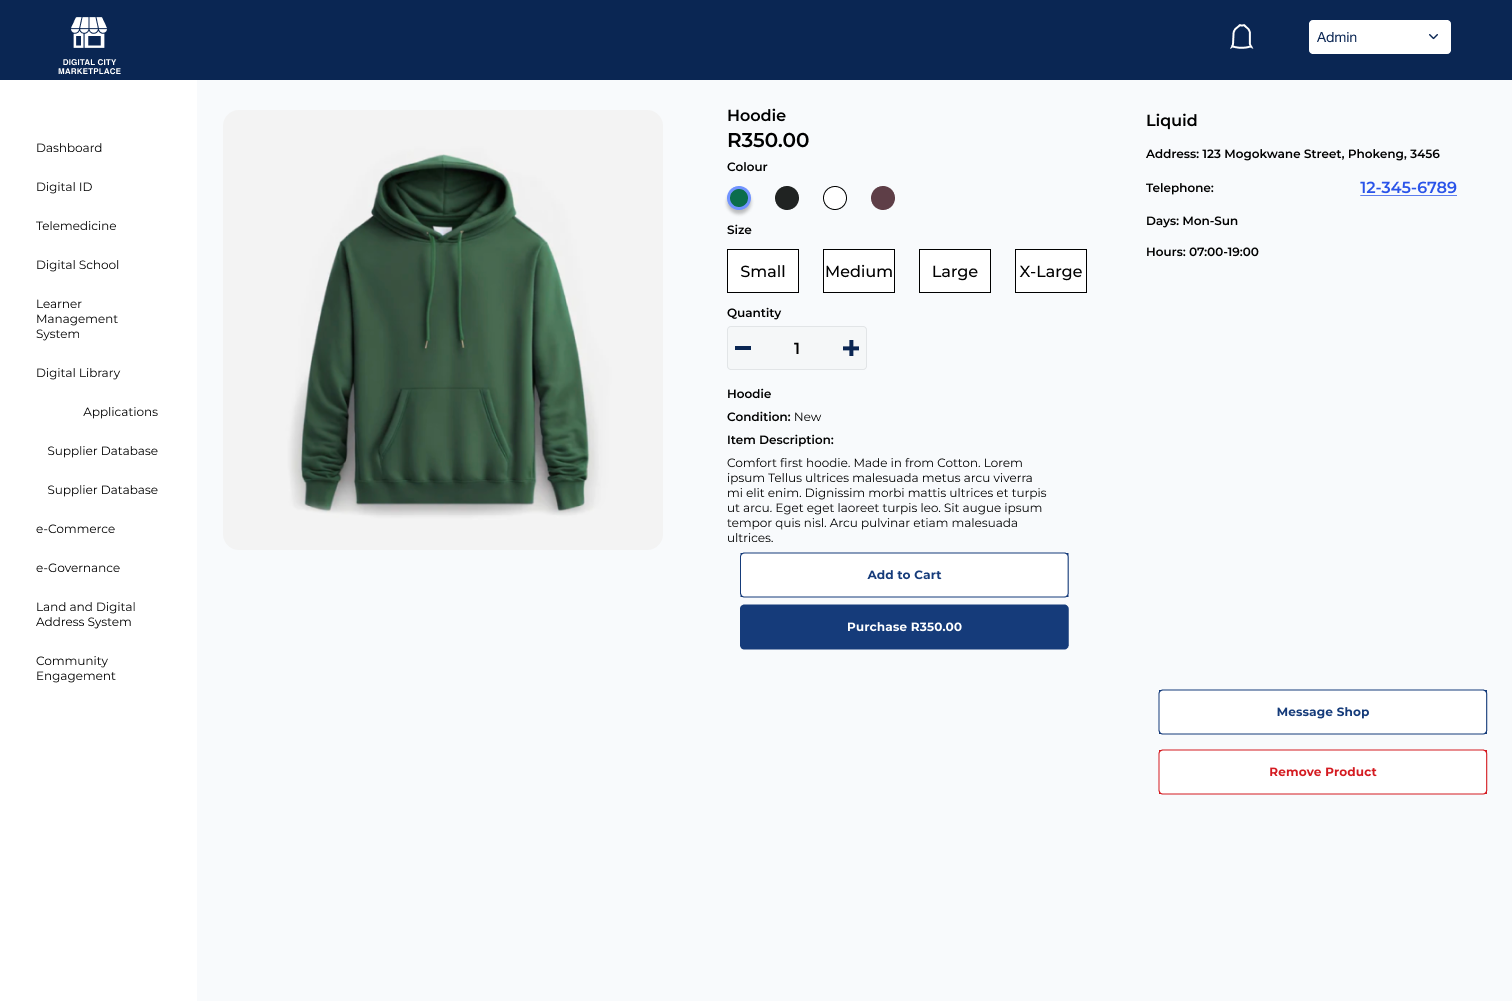
Selects ‘Remove Product.’
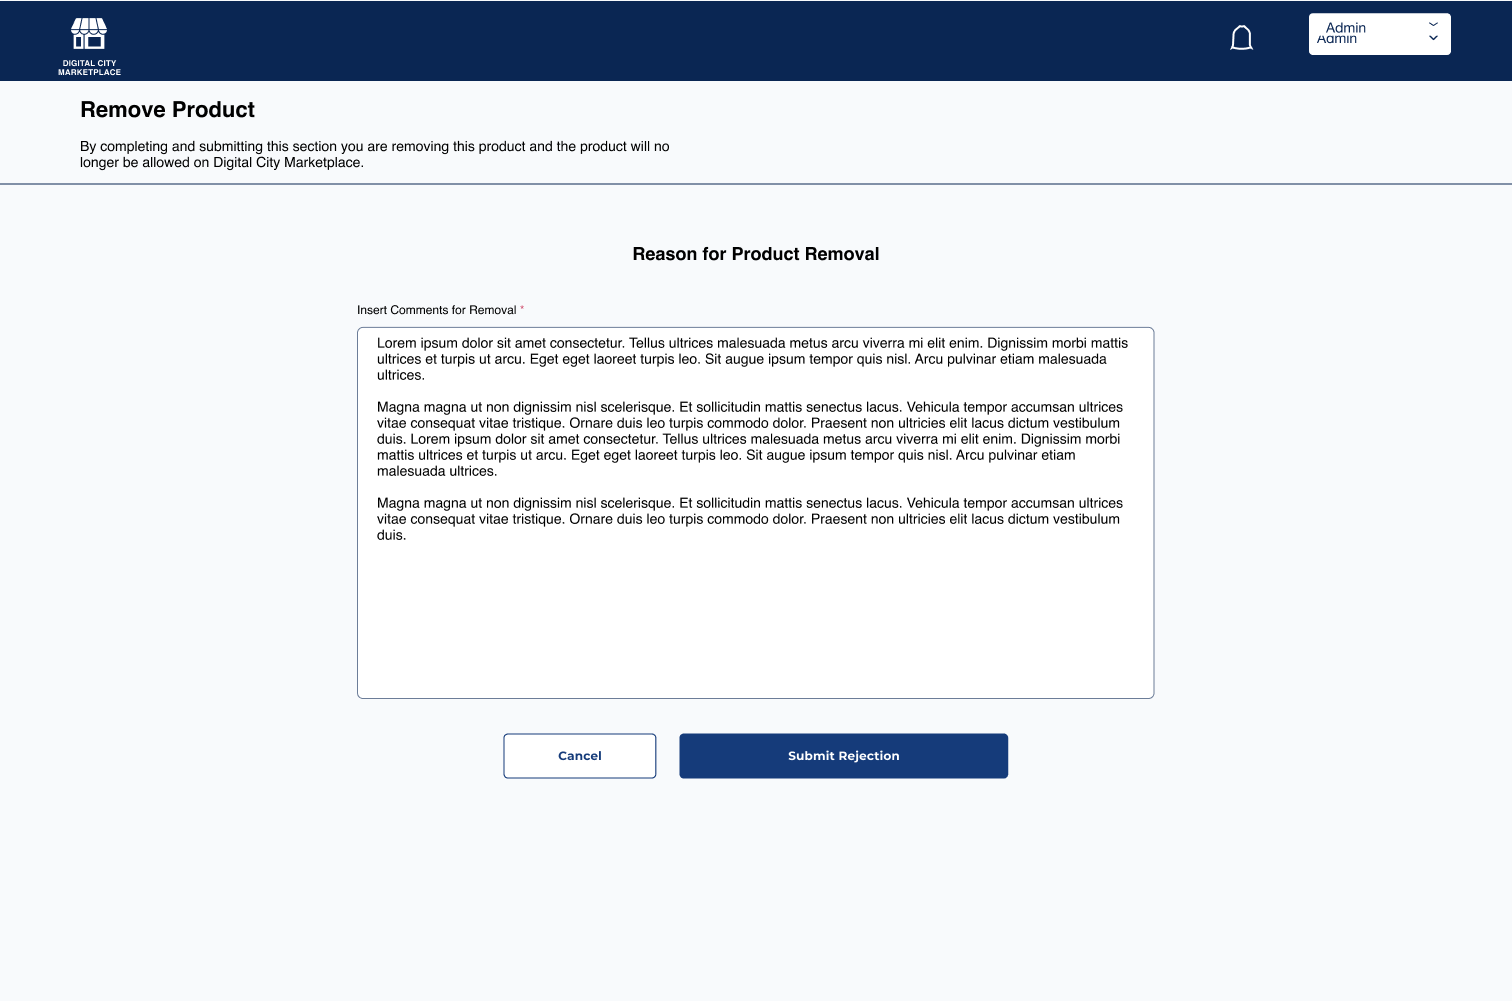
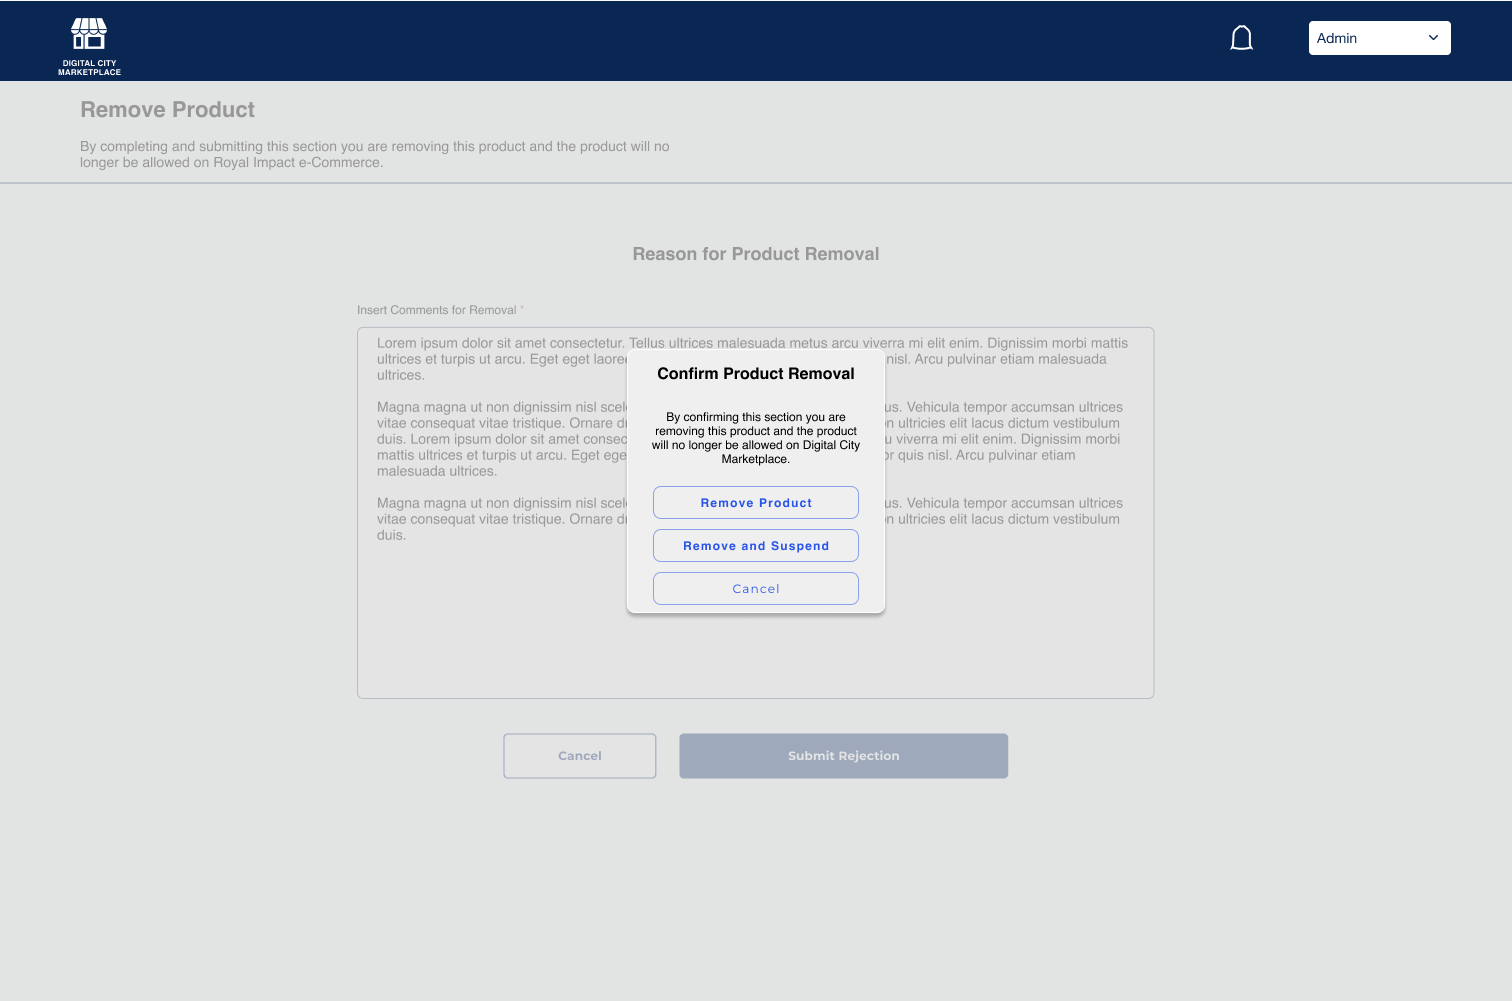
The Administrator provides a reason for the removal of the product and can decide to simply remove the product, or remove it and suspend the shop (if it is egregious).
Conclusions
It’s hard work creating an entire commercially viable platform in less than 2 weeks. Luckily there are a lot of examples in the real world to help out. The simplest aspect was certainly figuring out the shopping flow but also looking for solutions to the lack of “digital wallet” and having the customers work in unison with the shop owners. From my competitive analysis the style of form fill for creating shops was much more simplistic than some shopify platforms and the largest difficulty was certainly seeing how the shop could be run online (having no prior experience running an online shop or links to show how it is done). One positive from that is that I had set up the Square payments and interface during my time as the Assistant Concessions Manager at the Chicago Shakespeare that included all snacks, beverages, and merchandise, so that helped inspire my design choices there. In terms of Admin approvals and removing products it was simply to create fast avenues so it wouldn’t be aggressively time consuming to check on everything at all times.
